

If you like this review, then be sure to check back often for a wonderful giveaway sponsored by Glee Gum themselves. 3 lucky Inspiring Mamas will receive their very own candy making kit. Stay tuned for details! Yay!
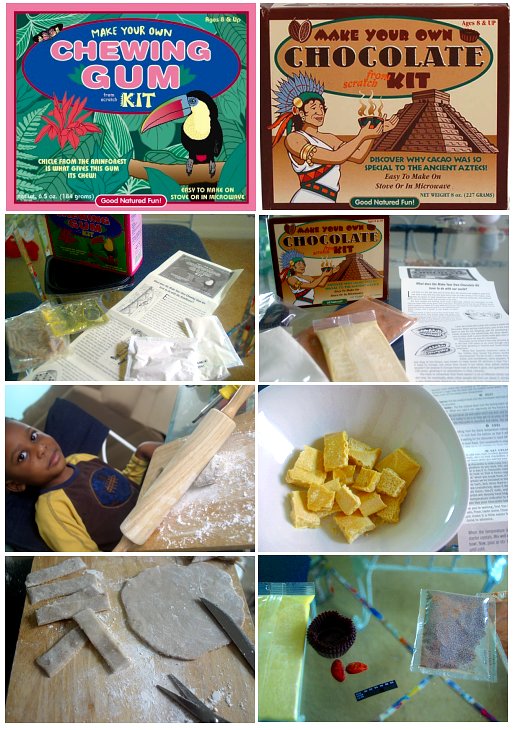
Recently we received two "Make Your Own Candy Kits" from Glee Gum. One kit was for making chewing gum(not bubble gum), and chocolate candy. I must say that both of these kits were exceptional and to top it all off, each kit comes with easy to read directions and a really great educational lesson on the back.
With the chewing gum kit you will learn about how the natural chicle ingredient, which is included within the kit is harvested & it's relation to the Guatemalan rainforest! The kit also comes with packets of both fruit and peppermint flavoring. I must note that the flavor is very mild, so let your children know ahead of time, that this is no bubble-liscious that you will be making! I really like this because it used a natural gum base and none of the synthetic stuff you tend to find in other gum kits.
$13 Chewing Gum Kit Includes:
Chicle gum base
Confectioners Sugar
Corn Syrup
2 Flavor packets
Pan for softening chicle gum base
Instructions & the story of chicle
Makes Approximately 50 pieces
With the chocolate candy kit you and your child will learn about the history of cacao, it's harvesting in Costa Rica, and the development of how chocolate candy came about. The cool thing about this kit is that you can add so many ingredients from your own pantry to make these little candies even more delectable!
$13 Chocolate Candy Kit Includes:
Certified Organic Cocoa Butter
Cocoa Powder
2 Cocoa Beans to Study
Confectioner's Sugar
Starter Crystals
A Temperature Indicator
Paper Candy Liners
Instructions & the story of chocolate
Makes 8oz. of dark chocolate
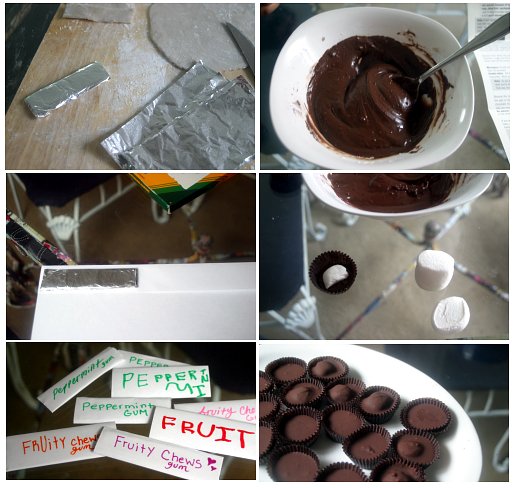
You can really make these kits into a great science and history lesson. As well as: art, math, writing, and brainstorming. We cut our chewing gum pieces into large strips(you could cut yours much smaller) and wrapped them up in tin foil and then used typing paper to make little wrappers for them. Break out the markers and crayons & let your child get creative with the wrapping! Now as far as the chocolate, I must say that this was our favorite kit, even though the gum follows up close! I highly suggest having some extras around such as marshmallows, nuts, coconut, cherries, etc. to fill the center of your chocolate candies. Here we used marshmallows in some of them.
My biggest tip with the chocolate kit is to not think that your temperature strip does not work. it may take a while for your chocolate to cool to 94 degrees. Also, you will want to make sure you DO NOT add the starter crystals until your melted chocolate mixture has reached the desired 94 degrees fahrenheit. Once our chocolate was cooled we ate a few of them and then chopped the rest up and baked a small batch of chocolate chip cookies!
The kits are recommended for ages 8 & up, however I was able to do these kits with my five year old and it worked great. He was able to help with putting in the time for the microwave, stirring, and opening some of the packages. I was highly impressed with both of these kits and would recommend it to any mom with kids, and most of all it makes wonderful and rewarding lesson plan. In fact you can find guided lesson plans for both the chewing gum and the chocolate kits on the Glee Gum website:
Chewing Gum Lesson Plan Chocolate Candy Lesson Plan


No comments:
Post a Comment